Sunday, August 16, 2015

My Adventures Through the British Isles

Trinity College - Dublin, Ireland
Greetings one and all!

It has been some months since I last posted. Much has transpired.

I took a long planned trip to the British Isles! I was gone for 15 days with my mother, a friend, and her mother. In that span of time I journeyed through England, Scotland, and Northern Ireland. The most surprising thing about the trip? My feet often felt frozen and looked paler than the rainy skies we encountered.

During the trip despite the consequences of extreme exhaustion my friend and I beat the odds of nonexistent wifi in a foreign country and managed to watch 2 movies: Far and Away and The Worlds End.

I heard John Farmer's song, "The Voice," on bagpipes.

We started our trip in England. We saw Big Ben, the London Eye, Parliament, the Globe Theatre, and many other trademark sights of London.

We saw Richard II performed in the Globe Theatre, it was fantastic! I loved it. As a nice addition we toured the Globe Theatre and got to sit in and watch them rehearsing for opening night which is when we attended.

We took an extra tour to Stonehenge. It took much longer than we wanted to. I will always look at pictures of Stonehenge with a tinges of mingled exasperation and fondness. Mostly exasperation. :)

The day we arrived in London the Tube (subway) workers were on strike for the day so the millions of people usually underground were up and about on the streets. Traffic was an ordeal, especially for 4 people with jet lag. The first day found us discouraged and disillusioned. However, London, despite the pain it gave us has become my favorite city. I love how it works and moves, once you can read the chaos, it's very simple to get around in. The Tube is incredibly efficient (if it's not off-line from a strike or undergoing repairs).

To my disappointment I encountered nothing Doctor Who. The entire trip we encountered sparse merchandise in a couple shops, and once I saw a Dalek in a wall mural.

We did visit Platform 9 3/4 and 221b Baker Street.

After London we also visited Stratford-Upon-Avon. Shakespeare's birthplace. It's a beautiful spot.

In Scotland we were treated to some lovely Highland Bagpipe music; I tried Haggis (actually quite tasty, do not ask what's in it); and we toured the Highlands which are very beautiful. The mountains are almost always buried in fog.

Throughout the trip I sampled wine, whisky, and of course... beer. We visited a couple of different breweries.

The highlight of Scotland was visiting Edinburgh (pronounced Ed-in-burrow) and getting to tour Edinburgh Castle. Nerdy Fact: The Red Wedding in season 3 of Game of Thrones is based on a real feast that took place in Edinburgh Castle.

Edinburgh Castle
Cool Swords!
The moral is: If the world is ending all around you make sure you grab your beer on the way down!
Cliffs of Moher

In Ireland we went to Titanic Belfast. A museum dedicated to the infamous ship. There was a clear floor that you could stand on and see the ocean floor moving over the remains of the ship.

We were treated to Irish music. My favorite night was in the Old Jameson Distillery. We had the most incredible group of musicians and divine food.

Another highlight of the trip was the Cliff of Moher. Gorgeous and vast. It's impossible to capture their enormity in a picture. They rise from 400-700 feet high. Let me tell you the ride to reach them in a massive tour bus can make you a little edgy.

100% Accurate Summary of Ireland's Weather
Something we could always look forward to was our hotel room. You could never predict what you would end up with. All of our hotels were wonderful. But some had little quirks that made showering an adventure or finding an outlet to charge your phone an ordeal. Every shower was different... And sometimes the outlets wouldn't match any of your converters. That feeling you get as your phone's battery drops at ever increasing speeds... But we lived! The lowest my phone's battery descended to was 5%.

This post is a very broad summary of all 15 days and I didn't touch on half of all we did. However I hope it gave you a little taste of the British Isles!

We booked our tour with CIE Tours. We chose the British and Irish Voyager. I fully recommend them.
_________________________________________________________________________________

As a little aside, today is my blog and Facebook page's anniversary! Here's to 2 years! Thank you for your support!

Monday, May 4, 2015

Art Curriculum- Week 30- Watercolor Blue Jay- Step by Step


Week 30- Watercolor Blue Jay- Step by Step

Category: Summer

What you will need:

-big/medium/little brushes (these don't have to be specific sizes, but it was good to expose the kids to having to use different brushes to accomplish different things)
-salt
-paint palettes
-cups/bowls to hold water
-multipurpose paper

-green, red, yellow, brown, light blue (ours was called turquoise), dark blue, purple, black, paint
-hairdryer (optional to speed up the salt drying process)
Time: 1.5 hours approx. (this is a more advanced project, the kids started to get impatient towards the end so maybe plan for a break halfway through - snacks are always a safe path to go!)
Prep (was an hour because I decided to draw the bird instead of going with a coloring sheet - the reference photo is from Pinterest).

 
Project:
  • 1: Background first! BIG brush. Green paint to cover the background. Drop the colors on quickly as you can without touching the bird. Sprinkle with salt. Dry with hairdryer.
  • 2: Red berries/flowers. BIG brush. Use the side of the brush to mark the paper. Be sure to leave white spots as much as possible.
  • 2: Green. Paint the leaves, fill in the white parts with the red.
  • 4: Yellow: BIG brush. Fill in the tree. Solid yellow. (tip: always try to paint the lightest colors first!)
  • 5: Brown. MEDIUM brush. Shade the bottom of the tree trunk.
  • Light blue. MEDIUM brush. Use side of the brush the make the blots. Paint the tail solid light blue.
  • 7: Purple. MEDIUM brush. Paint top half of the birds back and try to blend with the bottom part of the bird. Paint purple on the top of the birds head.
  • 7: (continued) SMALL brush. Dark blue. Add dark blue to the light blue blotches and the top of the head. The beak is dark blue and so is the eye.
  • 7: (continued) SMALL brush. Black. Detail. Black around the eye and feathering around the face. Emphasize the importance of leaving the chest and belly white along with parts of the face.

Overall: A lengthy project filled with a lot of detail. It's worth the patience because the results are lovely! But it does take more time. Suggestions include either simplifying the picture (remove extra leaves/flowers) or inserting a break time for a snack. It depends on your kid's patience and what level they are at.


(logging 2.5 hours for prep and execution)

Art Curriculum- Week 29- Blown "Glass" Sculptures


Week 29- Blown "Glass" Sculptures

Category: Summer

What you will need:

-plastic cups (we used 3 different kinds we had on hand)
-sharpies
-oven

Time: 1 hour (not including prep time)

I found this project on Aggieland Mommy.
  • Turn the oven on to 350 degrees
  • Color the cups with sharpies (we had a variety of cups we experimented with to get different shapes. Make sure you color thick and bold. This isn't a project for detail. Simple shapes and stripes work best.
  • Place the cups on tinfoil (open mouth facing down) on a pan.
  • Stick in the oven for 3-4 minutes. If you can turn on your oven light and try to watch them collapse! (just a warning, our fancy tall cups refused to melt all the way. They kept their cup shape)
  • Take out of the oven and use a knife/fork to pull the cups off the tinfoil. The plastic will still be soft, but it hardens almost immediately so don't be worried about ruining your sculpture.
  • After it's completely cool... enjoy!


Before melting


After melting

 
Overall: Easy and enjoyable. The kids needed some extra encouragement to keep coloring but they did really well!

(2 hours - prep included experimenting with the plastic and making examples)

Monday, April 13, 2015

Art Curriculum- Week 28- "Stained Glass" Tinfoil (Modern Art)


Week 28- "Stained Glass" Tinfoil (Modern Art)

Movement: Modern Art

What you will need:

-hot glue
-cardboard (or card stock)
-tinfoil (heavy duty holds up better)
-sharpies

Time: 45 minutes (not including prep which was 1 hour)

Prep:

I have a stack of cardboard saved from calendars and art pads that I was able to use. However cardstock will work too. You need a stiff or harder material.

I looked up modern art in stained glass windows. I drew the designs in hot glue. Creating solid geometric shapes (circles/rectangles/squares/etc.)

Frank Lloyd Wright has some excellent modern stained glass that I used as a reference.


When pressing the tinfoil down start from the middle and work your way to the edges. I used my pinkie fingers knuckle to press into the edges. Using Yor fingernails will read the foil.

I folded the excess over the back.
 

Project:

I told them they could pick three colors. And then could leave some spaces blank (to create a "fourth").

No same colors could touch except by corners.

Be careful that they don't color to hard or press on the edges, I couldn't get the tinfoil tight in the corners so the edges could tear.

After they finished I went back and touched up the spaces.

Voila!

The foil makes the colors extra vibrant and jewel toned.


frank lloyd wright


Overall: Easy and fun! The end result is beautiful. The only thing to watch for is that the foil doesn't tear, but we had no incidents.

Related blog posts:

-Tardis Step By Step (Cardboard)
-Abstract Watercolor Trees

(logging 2 hours for prep and execution)

Friday, April 10, 2015

Art Curriculum- Week 27- Salt Sculpture


Week 27- Salt Sculpture

Category: Abstract Expressionism

Project from Fun at Home With Kids.

What you will need:

-salt
-water
-eye droppers
-watercolors
-wide/low bowls or plates with a raised border

Time: 30 minutes (minus prep time)

Prep: Mix 3 cups of salt with 3 teaspoons of water. Mix until the salt is damp. It should be plenty of water, if the salt stays dry add a 1/4 teaspoon of water.

Pour and push the salt into your containers. Plastic works better, but glass is fine too. I used little bowls.

Let them sit 12-24 hours. Then turn the containers over and the salt should slip out. I thumped a few of mine.

When the salt is damp it's very fragile and crumbly, but once it dries it's fairly firm.

Activity: Each child got their own salt sculpture in a plate with a border (to keep the loose salt and watercolors contained). We put one eye dropper to each color and we passed the colors around. Brushes are too rough on the salt which is why eye droppers are preferred.
 

Overall: easy prep and very cool to see the vibrant colors. Use caution when moving the salt as long as it's still damp. One of them crumbled when I tried to lift it.

(logging 1 1/2 hours for prep and execution)

Related blog posts:

-Watercolor Trees
-

Tuesday, March 31, 2015

Art Curriculum- Week 26- Tissue Paper Hyacinth


Week 26- Tissue Paper Hyacinth

Category: Spring/Easter

We reviewed our Easter Colors.

Project from Aunt Peaches.

What you will need:

-tissue paper (pink/purple/white/yellow)
-ruler
-scissors
-thin straws
-green masking tape

Time: 1 hour (not including prep time)

Prep:
  • Cut tissue paper in 3"x18" strips
Activity:
  • Fold in half long ways like a hot dog
  • Snip strips (caution the kids to NOT go all the way through)
  • Tape one end to the top of the straw
  • Wrap 2-4 times around the tip before winding down the length of the straw
  • Tape the end
  • Wrap the remaining length of the straw with the green tape


Overall: easy and fairly quick! They look gorgeous and will be great additions to decorate our tables for Easter.


Related Blog Posts:
-Easter Lily DIY
-Paper Butterfly DIY
-Easter Colors

(logging 1 1/2 hours for prep and execution)

Wednesday, March 25, 2015

Art Curriculum- Week 25- Butterfly DIY


Week 25- Butterfly DIY

Category: Spring/Easter

We reviewed our Easter Colors.

What you will need:

-ruler
-pencil
-construction paper (2 shades to every butterfly or solid colors as you wish)
-scissors
-stapler
-pipe cleaner

Time: 1 hour + prep time

I found this project from a post on Pinterest.

Prep: (if you have square paper you can skip the first 2 steps pictured below)

Otherwise:
  • Fold the paper as pictured in section 1 below.
  • Cut off the excess. This will give you a square piece of paper.
  • Using the center crease as a marking point, use your ruler to draw lines across the entire page.
Activity:
  • Have the kids fold along the lines back and forth in an accordion fold. Some may struggle with this at first. Encourage them not to hurry. A lot of them made sloppy creases that had to be fixed.
  • Put the 2 folded squares next to each other (section 4 pictured below)
  • Staple the inside folds of the papers together.
  • Tie the pipe cleaner (try to make the ends of equal length) and bend the ends to resemble butterfly antennae.
  • We ended up having to staple almost all edges together to keep the wings outspread. The accordion fold won't want to stay outspread.


brights wanderings

brights wanderings

Related blog posts:

-Easter Colors
-Easter Crosses (egg cartons)
-Blooming Beauties (finger painting)

(logging 2 hours for prep and execution)

Sunday, March 22, 2015

Extra- Blooming Beauties (finger painting project)

tree paintings
Our projects for the month of March are all Spring/Easter themed. This is an extra project. I got this idea from a picture on Pinterest.

Category: Spring/Easter

What you will need:

-green paper
-white, light pink, dark pink paint (tempera or acrylic)
-black marker
-newspaper (to spread out on the table underneath the project)

Time 45 minutes approx

Prep: Draw or trace a tree using the black marker on the green paper.
  • Reviewed with the kids the Easter Colors we were using and the 3 parts of a shadow. There's a light tone, a middle tone, and a dark tone.

  • We used 3 colors, to avoid mixing paints I assigned each different color to a different finger.

    Pointer finger: is White, the brightest part of a shadow in shading. There's also a song called "This Little Light of Mine." This is the bright light.
    Middle finger: is the Middle Tone.
    Ring finger: is the Dark Finger.

    While we didn't use shading in this piece, if you ever wanted to do a finger painting involving shading this would be a clear and easy method to teach to the kids until they are older.
bright's wanderings
  • Finger painting the trees I let them have at it. I told them no straight lines and don't cover the hold page. Stay on or around the branches. Imagine you're painting a beautiful pink and puffy and round cloud. I showed them lots of pictures of trees in bloom so that they could see for themselves what they were trying to paint. Some of them went with Cherry Blossoms while others looked more like Apple Tree Blossoms. We did White, Light Pink, Dark Pink.

  • Then all they had to do was sign their names!

Overall: Fun. Easy. Time will depend on the level your kids are at.

Related blog posts:

-Easter Colors
-Easter Lilies (out of Egg Cartons)
-Tri Toned Cube

(logging 1 1/2 hours for prep and execution)

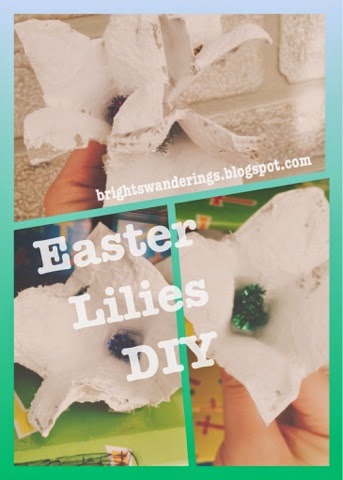
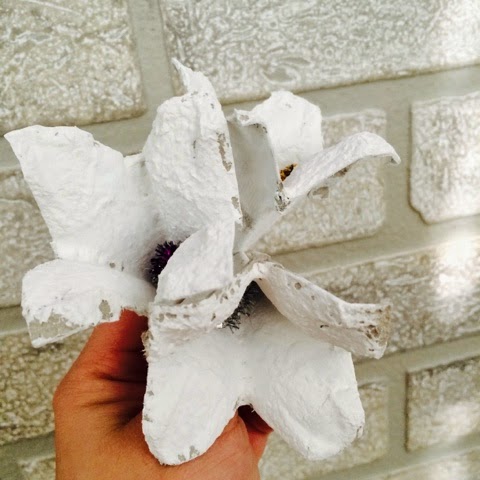
Art Curriculum- Week 24- Easter Lilies DIY


Week 24-Easter Lilies DIY

Category: Spring/Easter

What you will need:

-egg cartons
-white paint (tempera or acrylic)
-pipe cleaner (yellow for traditional lilies, I opted for sparkly)
-scissors
-brushes (stiffer bristles are easier to work with)

Time: 2 hours (prep and execution)

I found this project on Mr Printables.

Prep:
  • Cut your egg carton into stripes down the indent. Then cut and separate the hills. (Tip): Don't worry if your "hills" don't look like mine. Each brand and carton often has different proportions. Some are long and thin and other are rounded and stubby. Try and find a carton where the hills are angular with 4 sides.
  • Trim the excess fluff and tears. The flat I used held 2 1/2 doz eggs but I was unable to use the edges.


One unpainted flower
Activity
  • Give the kids white paint and a brush. Tell them to cover all of their flowers in white paint.
  • Cut the pipe cleaner a little longer than the desired length for a stem. Curl one end around a pencil to form the stamen of the flower.
  • Poke a hole through the bottom center of the flower and push the straight end of the pipe cleaner through until it gently stops against the curled end. I used a thermometer to poke my holes. A couple of the kids were able to curl their own stamens.
  • We also reviewed our Easter Colors. I made a separate blog post on the meaning behind the colors of Easter. Each kid had to tell me the meaning behind the color of pipe cleaner they wanted. :)


Overall: A lot of prep work because of the egg cartons. But fairly easy and the turnout is very pretty!

Related Blog Posts:

-Easter Colors
-Easter Crosses (Out of Egg Cartons)
-Easter Egg "Reveal" Card

(logging 2 hours for prep and execution)

Friday, March 13, 2015

Art Curriculum- Week 23- Easter Egg "Reveal" Card


Week 23- Easter Egg "Reveal" Card

Category: Spring/Easter

What you will need:
-construction paper (red, yellow, blue, green, pink, purple)
-rainbow construction paper (optional)
-tape
-staples
-thin cardboard (or cardstock, a very stiff paper will do)
-black marker
-ruler
-glue sticks
-exacto knife
-printer

Time: 2-3+ hours - this project requires a lot of prep work and after work - it's a more challenging activity and has some delicate parts - patience might be needed along with those staples!
This is another original Ellana project! However I was inspired by multiple sources and activities I've seen over time.

A theme I am using all of March, with the intent of wrapping it all up in time for Easter, is "The True Colors of Easter." To view a post I wrote up with the list of the main colors I'm using and their significance click here.

Prep:
  • As pictured in (1) fold the rainbow paper in half and cut along the fold so that you have 2 equal pieces of paper - do the same for your construction paper - the rainbow paper should be trimmed so that the construction paper becomes a border as pictured below in (2)
  • (3) That takes care of one half of the paper, the other half cut out an egg shape
  • (4) Use a ruler to draw lines (these will be filled with zentangles by the kids) - for the younger ones I did straight lines; for the older ones I made them lop sided and zig-zaggy for a cool effect
  • Type up a variety of bible verse you would like to use. I tried to fit the verses into the 3"x3" margins. I used Microsoft Word. By setting my page to 3 Columns that helped get the proper width for the text. Run them off and cut them into shape, I aimed for square as much as I could.
  • I used scissors (if you have an exacto knife this would be the time to break it out) to cut a square in the center of my construction paper. 4"x4" is a rough estimate so that your verse has a small border. You can alter this as you like.
  • At this point you could almost stop here with the card by decorating the border (3rd rectangle below to the far right) with stamps or hand drawn illustrations. It looks very nice already.
Project:
  • Have the kids fill in their eggs with zentagles (I've attached some links below to some of our previous projects with zentangles)
  • I then gave them their prepped pieces of construction paper after we reviewed our Easter Colors.
  • Use lots and lots of glue on the paper. Then press the rainbow paper on top to form the back.
  • Flip it over and glue the bible verse in the center of your little rainbow window

After Project: This is where it's very hard to explain without demonstrating it. To make the tab I suggest thin cardboard or card stock. It needs to be stiff material of some kinds, otherwise your egg will flop all over the place. :)

  • Use the exacto knife to slice a slit in the left side of the "frame"
  • Cut a strip of cardboard to fit the slit. Try and make it longer than you think you will need. It can always be trimmed. Tape one end to the far left side of the egg (with the back side facing up) - flip the egg over so the zentangle is in front - push the other end under and through the slit.
  • Cut a short piece of cardboard. It should be skinny, but wider than the strip (pictured below) that way the egg won't fall out of the frame.
  • If you would like to see a demonstration of this- here's a short video that explains the pull tab in a much clearer way. --> How to Make a Pull Tab It's part 1 of 2. But neither video is very long, this is the concept I used to create these cards.

TAA DAA.

Zentangle eggs that roooolllllll aside to reveal---!!!


------ A lovely Bible verse! :) To remember the true reason for Easter.


  • As an extra aside, some of the kids wanted to write a "letter" to the person they were planning on giving their cards to. On the back of the card some drew, and some just wrote "happy easter."


Overall: You might need a bit more time on your hands than you have available if you're looking for a quick morning project. This took me a good portion of the morning to prepare. However it's a fun activity to prepare, and it can easily be turned to more formal purposes.

Related blog posts:

-Zentangle Valentines
-Zentangle Snowflake
-Zentangle Artwork

-The True Colors of Easter

(logging 3 hours for prep and execution - more prep than actual project time for the kids)

Thursday, March 5, 2015

The True Colors of Easter

The True Colors of Easter

Hey guys, GUESS WHAT?


I might have laughed a little too hard at this but I have the luxury of absolutely adoring winter and everything it brings: Snow, cold, winter skies, and Christmas cups still being socially acceptable.

Haha but what else is around the corner? Easter!

Believe it or not in a month we'll be celebrating by eating boiled eggs and dressing in cheery pastels. Whether or not we'll be celebrating indoors or outside remains to be seen.

To prepare for Easter, the month of March in my art curriculum is devoted to Easter and Spring themed projects. Our first project earlier this week was creating a beautiful cross using egg cartons. --> Easter Cross

For each project, we will be attempting to use a specific set of pastel colors commonly found during the Easter season.

Here is the list that we will or might be using this months:
  • Purple: Purples often represents royalty. Jesus is often called the "Prince of Peace" and is the Son of God making him royalty.
  • Blue: Represents the sky for the night the Son of God came to Earth.
  • White/Silver: Represents purity. Jesus lived a perfect, pure life.
  • Black: Represents our mourning for Jesus' death on the cross for our sin.
  • Red: Represents Jesus' blood that he shed on the cross for us.
  • Yellow/Gold: Represents light. The presence of God and Jesus' rising from the dead. Gold represents precious things such as gold and jewels and reminds us that Jesus is the most precious thing of all.
  • Pink: Represents joy/happiness at Jesus' rising from the dead.
  • Green: In Jesus' death we have New Life. Just as in spring when the world comes alive again with green leaves and glowing flowers we have come alive in God's word and sacrifice.
Keep in mind, this is a simplified version and not a complete list of the symbolic colors. It is the gist of how I explain it to the kids. We will be reviewing these colors all through March in our Easter projects.

To view more complete or alternate lists, here are the resources I used to compile my own form the Easter colors:

Colors of Easter

Colors of Easter - Poem

Meaning of Church Colors - Extensive List

Tuesday, March 3, 2015

Art Curriculum- Week 22- Easter Crosses (Out of Egg Cartons!)

Easter cross


Week 22- Egg Carton Crosses

Category: Spring/Easter

What you will need:

-egg cartons
-blue, yellow, pink, purple, blue, white tempera paint (or acrylic)
-hot glue
-(as close to the same colors used in the paint) ribbons
-brushes
-paint palettes
-decoration (example: I used sparkly butterflies from Hobby Lobby to work as the center decoration)

Time: 45-60 minutes (we spread this project over 2 days so that the paint would have plenty of time to dry)

I found this project at Katie's Crochet Goodies. To view the original project click here.

Prep:
  • I cut the egg cartons longways first, 6 in a row. Then for the "arms" I cut 3 in a row.

  • Beware of tears or splits. These can easily be fixed with hot glue.

  • Lay the row of 3 over the row of 6. Use hot glue to attach. Trim the egg carton so that the cross will lay flat.
  • I taught the kids what each of these 6 colors mean (later this week I will share a blog post on my Easter Colors lesson). Before I allowed them to take their color I made encouraged them to repeat back to me what their color meant. Then they could paint. Remind them to be gentle, the egg cartons are very bendy.
  • Allow the crosses to dry.
  • The next day I reviewed the colors with them again and what they symbolized. Then while they worked on sign language (which involved signing the colors and their basic meanings) I called up one at a time.
  • They could pick 3 colors. I tied the ribbons in the center to keep them from slipping all over the place. I used hot glue and let them press the knotted part of the ribbon into a glob of glue I laid down in the center of the cross. Then they each got to pick a butterfly and stick that on top of the ribbons.
  • Voila! A beautiful Easter decoration!

    Look for my blog post later this week explaining the symbolism of the colors!


easter projects

Related blog posts:

-Pointillism
-Steampunk Earrings

(logging 3 hours for prep and execution - includes lesson, not just the craft)