Showing posts with label spring projects. Show all posts

Tuesday, March 31, 2015

Art Curriculum- Week 26- Tissue Paper Hyacinth


Week 26- Tissue Paper Hyacinth

Category: Spring/Easter

We reviewed our Easter Colors.

Project from Aunt Peaches.

What you will need:

-tissue paper (pink/purple/white/yellow)
-ruler
-scissors
-thin straws
-green masking tape

Time: 1 hour (not including prep time)

Prep:
  • Cut tissue paper in 3"x18" strips
Activity:
  • Fold in half long ways like a hot dog
  • Snip strips (caution the kids to NOT go all the way through)
  • Tape one end to the top of the straw
  • Wrap 2-4 times around the tip before winding down the length of the straw
  • Tape the end
  • Wrap the remaining length of the straw with the green tape


Overall: easy and fairly quick! They look gorgeous and will be great additions to decorate our tables for Easter.


Related Blog Posts:
-Easter Lily DIY
-Paper Butterfly DIY
-Easter Colors

(logging 1 1/2 hours for prep and execution)

Wednesday, March 25, 2015

Art Curriculum- Week 25- Butterfly DIY


Week 25- Butterfly DIY

Category: Spring/Easter

We reviewed our Easter Colors.

What you will need:

-ruler
-pencil
-construction paper (2 shades to every butterfly or solid colors as you wish)
-scissors
-stapler
-pipe cleaner

Time: 1 hour + prep time

I found this project from a post on Pinterest.

Prep: (if you have square paper you can skip the first 2 steps pictured below)

Otherwise:
  • Fold the paper as pictured in section 1 below.
  • Cut off the excess. This will give you a square piece of paper.
  • Using the center crease as a marking point, use your ruler to draw lines across the entire page.
Activity:
  • Have the kids fold along the lines back and forth in an accordion fold. Some may struggle with this at first. Encourage them not to hurry. A lot of them made sloppy creases that had to be fixed.
  • Put the 2 folded squares next to each other (section 4 pictured below)
  • Staple the inside folds of the papers together.
  • Tie the pipe cleaner (try to make the ends of equal length) and bend the ends to resemble butterfly antennae.
  • We ended up having to staple almost all edges together to keep the wings outspread. The accordion fold won't want to stay outspread.


brights wanderings

brights wanderings

Related blog posts:

-Easter Colors
-Easter Crosses (egg cartons)
-Blooming Beauties (finger painting)

(logging 2 hours for prep and execution)

Sunday, March 22, 2015

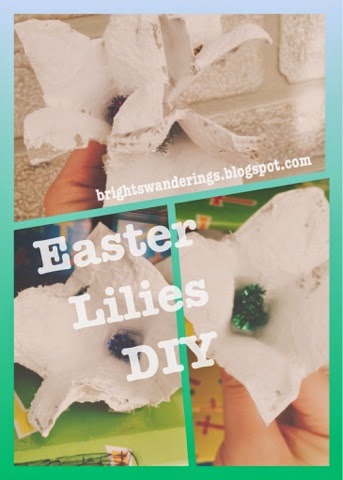
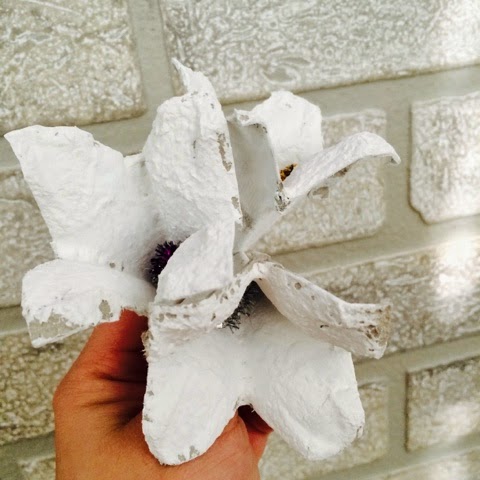
Art Curriculum- Week 24- Easter Lilies DIY


Week 24-Easter Lilies DIY

Category: Spring/Easter

What you will need:

-egg cartons
-white paint (tempera or acrylic)
-pipe cleaner (yellow for traditional lilies, I opted for sparkly)
-scissors
-brushes (stiffer bristles are easier to work with)

Time: 2 hours (prep and execution)

I found this project on Mr Printables.

Prep:
  • Cut your egg carton into stripes down the indent. Then cut and separate the hills. (Tip): Don't worry if your "hills" don't look like mine. Each brand and carton often has different proportions. Some are long and thin and other are rounded and stubby. Try and find a carton where the hills are angular with 4 sides.
  • Trim the excess fluff and tears. The flat I used held 2 1/2 doz eggs but I was unable to use the edges.


One unpainted flower
Activity
  • Give the kids white paint and a brush. Tell them to cover all of their flowers in white paint.
  • Cut the pipe cleaner a little longer than the desired length for a stem. Curl one end around a pencil to form the stamen of the flower.
  • Poke a hole through the bottom center of the flower and push the straight end of the pipe cleaner through until it gently stops against the curled end. I used a thermometer to poke my holes. A couple of the kids were able to curl their own stamens.
  • We also reviewed our Easter Colors. I made a separate blog post on the meaning behind the colors of Easter. Each kid had to tell me the meaning behind the color of pipe cleaner they wanted. :)


Overall: A lot of prep work because of the egg cartons. But fairly easy and the turnout is very pretty!

Related Blog Posts:

-Easter Colors
-Easter Crosses (Out of Egg Cartons)
-Easter Egg "Reveal" Card

(logging 2 hours for prep and execution)

Tuesday, March 3, 2015

Art Curriculum- Week 22- Easter Crosses (Out of Egg Cartons!)

Easter cross


Week 22- Egg Carton Crosses

Category: Spring/Easter

What you will need:

-egg cartons
-blue, yellow, pink, purple, blue, white tempera paint (or acrylic)
-hot glue
-(as close to the same colors used in the paint) ribbons
-brushes
-paint palettes
-decoration (example: I used sparkly butterflies from Hobby Lobby to work as the center decoration)

Time: 45-60 minutes (we spread this project over 2 days so that the paint would have plenty of time to dry)

I found this project at Katie's Crochet Goodies. To view the original project click here.

Prep:
  • I cut the egg cartons longways first, 6 in a row. Then for the "arms" I cut 3 in a row.

  • Beware of tears or splits. These can easily be fixed with hot glue.

  • Lay the row of 3 over the row of 6. Use hot glue to attach. Trim the egg carton so that the cross will lay flat.
  • I taught the kids what each of these 6 colors mean (later this week I will share a blog post on my Easter Colors lesson). Before I allowed them to take their color I made encouraged them to repeat back to me what their color meant. Then they could paint. Remind them to be gentle, the egg cartons are very bendy.
  • Allow the crosses to dry.
  • The next day I reviewed the colors with them again and what they symbolized. Then while they worked on sign language (which involved signing the colors and their basic meanings) I called up one at a time.
  • They could pick 3 colors. I tied the ribbons in the center to keep them from slipping all over the place. I used hot glue and let them press the knotted part of the ribbon into a glob of glue I laid down in the center of the cross. Then they each got to pick a butterfly and stick that on top of the ribbons.
  • Voila! A beautiful Easter decoration!

    Look for my blog post later this week explaining the symbolism of the colors!


easter projects

Related blog posts:

-Pointillism
-Steampunk Earrings

(logging 3 hours for prep and execution - includes lesson, not just the craft)