Friday, April 10, 2015

Art Curriculum- Week 27- Salt Sculpture


Week 27- Salt Sculpture

Category: Abstract Expressionism

Project from Fun at Home With Kids.

What you will need:

-salt
-water
-eye droppers
-watercolors
-wide/low bowls or plates with a raised border

Time: 30 minutes (minus prep time)

Prep: Mix 3 cups of salt with 3 teaspoons of water. Mix until the salt is damp. It should be plenty of water, if the salt stays dry add a 1/4 teaspoon of water.

Pour and push the salt into your containers. Plastic works better, but glass is fine too. I used little bowls.

Let them sit 12-24 hours. Then turn the containers over and the salt should slip out. I thumped a few of mine.

When the salt is damp it's very fragile and crumbly, but once it dries it's fairly firm.

Activity: Each child got their own salt sculpture in a plate with a border (to keep the loose salt and watercolors contained). We put one eye dropper to each color and we passed the colors around. Brushes are too rough on the salt which is why eye droppers are preferred.
 

Overall: easy prep and very cool to see the vibrant colors. Use caution when moving the salt as long as it's still damp. One of them crumbled when I tried to lift it.

(logging 1 1/2 hours for prep and execution)

Related blog posts:

-Watercolor Trees
-

Tuesday, March 31, 2015

Art Curriculum- Week 26- Tissue Paper Hyacinth


Week 26- Tissue Paper Hyacinth

Category: Spring/Easter

We reviewed our Easter Colors.

Project from Aunt Peaches.

What you will need:

-tissue paper (pink/purple/white/yellow)
-ruler
-scissors
-thin straws
-green masking tape

Time: 1 hour (not including prep time)

Prep:
  • Cut tissue paper in 3"x18" strips
Activity:
  • Fold in half long ways like a hot dog
  • Snip strips (caution the kids to NOT go all the way through)
  • Tape one end to the top of the straw
  • Wrap 2-4 times around the tip before winding down the length of the straw
  • Tape the end
  • Wrap the remaining length of the straw with the green tape


Overall: easy and fairly quick! They look gorgeous and will be great additions to decorate our tables for Easter.


Related Blog Posts:
-Easter Lily DIY
-Paper Butterfly DIY
-Easter Colors

(logging 1 1/2 hours for prep and execution)

Wednesday, March 25, 2015

Art Curriculum- Week 25- Butterfly DIY


Week 25- Butterfly DIY

Category: Spring/Easter

We reviewed our Easter Colors.

What you will need:

-ruler
-pencil
-construction paper (2 shades to every butterfly or solid colors as you wish)
-scissors
-stapler
-pipe cleaner

Time: 1 hour + prep time

I found this project from a post on Pinterest.

Prep: (if you have square paper you can skip the first 2 steps pictured below)

Otherwise:
  • Fold the paper as pictured in section 1 below.
  • Cut off the excess. This will give you a square piece of paper.
  • Using the center crease as a marking point, use your ruler to draw lines across the entire page.
Activity:
  • Have the kids fold along the lines back and forth in an accordion fold. Some may struggle with this at first. Encourage them not to hurry. A lot of them made sloppy creases that had to be fixed.
  • Put the 2 folded squares next to each other (section 4 pictured below)
  • Staple the inside folds of the papers together.
  • Tie the pipe cleaner (try to make the ends of equal length) and bend the ends to resemble butterfly antennae.
  • We ended up having to staple almost all edges together to keep the wings outspread. The accordion fold won't want to stay outspread.


brights wanderings

brights wanderings

Related blog posts:

-Easter Colors
-Easter Crosses (egg cartons)
-Blooming Beauties (finger painting)

(logging 2 hours for prep and execution)

Sunday, March 22, 2015

Extra- Blooming Beauties (finger painting project)

tree paintings
Our projects for the month of March are all Spring/Easter themed. This is an extra project. I got this idea from a picture on Pinterest.

Category: Spring/Easter

What you will need:

-green paper
-white, light pink, dark pink paint (tempera or acrylic)
-black marker
-newspaper (to spread out on the table underneath the project)

Time 45 minutes approx

Prep: Draw or trace a tree using the black marker on the green paper.
  • Reviewed with the kids the Easter Colors we were using and the 3 parts of a shadow. There's a light tone, a middle tone, and a dark tone.

  • We used 3 colors, to avoid mixing paints I assigned each different color to a different finger.

    Pointer finger: is White, the brightest part of a shadow in shading. There's also a song called "This Little Light of Mine." This is the bright light.
    Middle finger: is the Middle Tone.
    Ring finger: is the Dark Finger.

    While we didn't use shading in this piece, if you ever wanted to do a finger painting involving shading this would be a clear and easy method to teach to the kids until they are older.
bright's wanderings
  • Finger painting the trees I let them have at it. I told them no straight lines and don't cover the hold page. Stay on or around the branches. Imagine you're painting a beautiful pink and puffy and round cloud. I showed them lots of pictures of trees in bloom so that they could see for themselves what they were trying to paint. Some of them went with Cherry Blossoms while others looked more like Apple Tree Blossoms. We did White, Light Pink, Dark Pink.

  • Then all they had to do was sign their names!

Overall: Fun. Easy. Time will depend on the level your kids are at.

Related blog posts:

-Easter Colors
-Easter Lilies (out of Egg Cartons)
-Tri Toned Cube

(logging 1 1/2 hours for prep and execution)

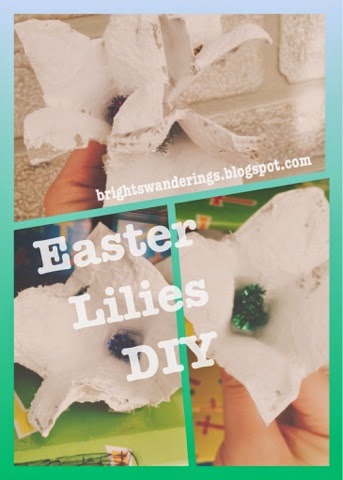
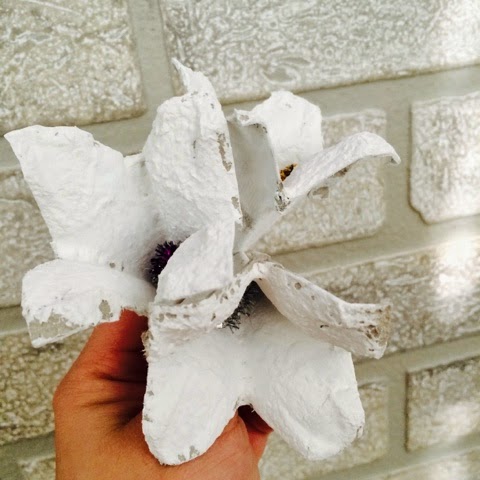
Art Curriculum- Week 24- Easter Lilies DIY


Week 24-Easter Lilies DIY

Category: Spring/Easter

What you will need:

-egg cartons
-white paint (tempera or acrylic)
-pipe cleaner (yellow for traditional lilies, I opted for sparkly)
-scissors
-brushes (stiffer bristles are easier to work with)

Time: 2 hours (prep and execution)

I found this project on Mr Printables.

Prep:
  • Cut your egg carton into stripes down the indent. Then cut and separate the hills. (Tip): Don't worry if your "hills" don't look like mine. Each brand and carton often has different proportions. Some are long and thin and other are rounded and stubby. Try and find a carton where the hills are angular with 4 sides.
  • Trim the excess fluff and tears. The flat I used held 2 1/2 doz eggs but I was unable to use the edges.


One unpainted flower
Activity
  • Give the kids white paint and a brush. Tell them to cover all of their flowers in white paint.
  • Cut the pipe cleaner a little longer than the desired length for a stem. Curl one end around a pencil to form the stamen of the flower.
  • Poke a hole through the bottom center of the flower and push the straight end of the pipe cleaner through until it gently stops against the curled end. I used a thermometer to poke my holes. A couple of the kids were able to curl their own stamens.
  • We also reviewed our Easter Colors. I made a separate blog post on the meaning behind the colors of Easter. Each kid had to tell me the meaning behind the color of pipe cleaner they wanted. :)


Overall: A lot of prep work because of the egg cartons. But fairly easy and the turnout is very pretty!

Related Blog Posts:

-Easter Colors
-Easter Crosses (Out of Egg Cartons)
-Easter Egg "Reveal" Card

(logging 2 hours for prep and execution)